Web remote UI for OBS
Controlling OBS Studio via a web interface
A web-based remote UI for controlling livestreaming app OBS Studio using the obs-websocket plugin, which I designed and developed to improve lecture livestreams.
(Still to come: video of latest version in action)
Try web remote for OBS online nowIt improves on other web UIs for controlling OBS in a few ways:
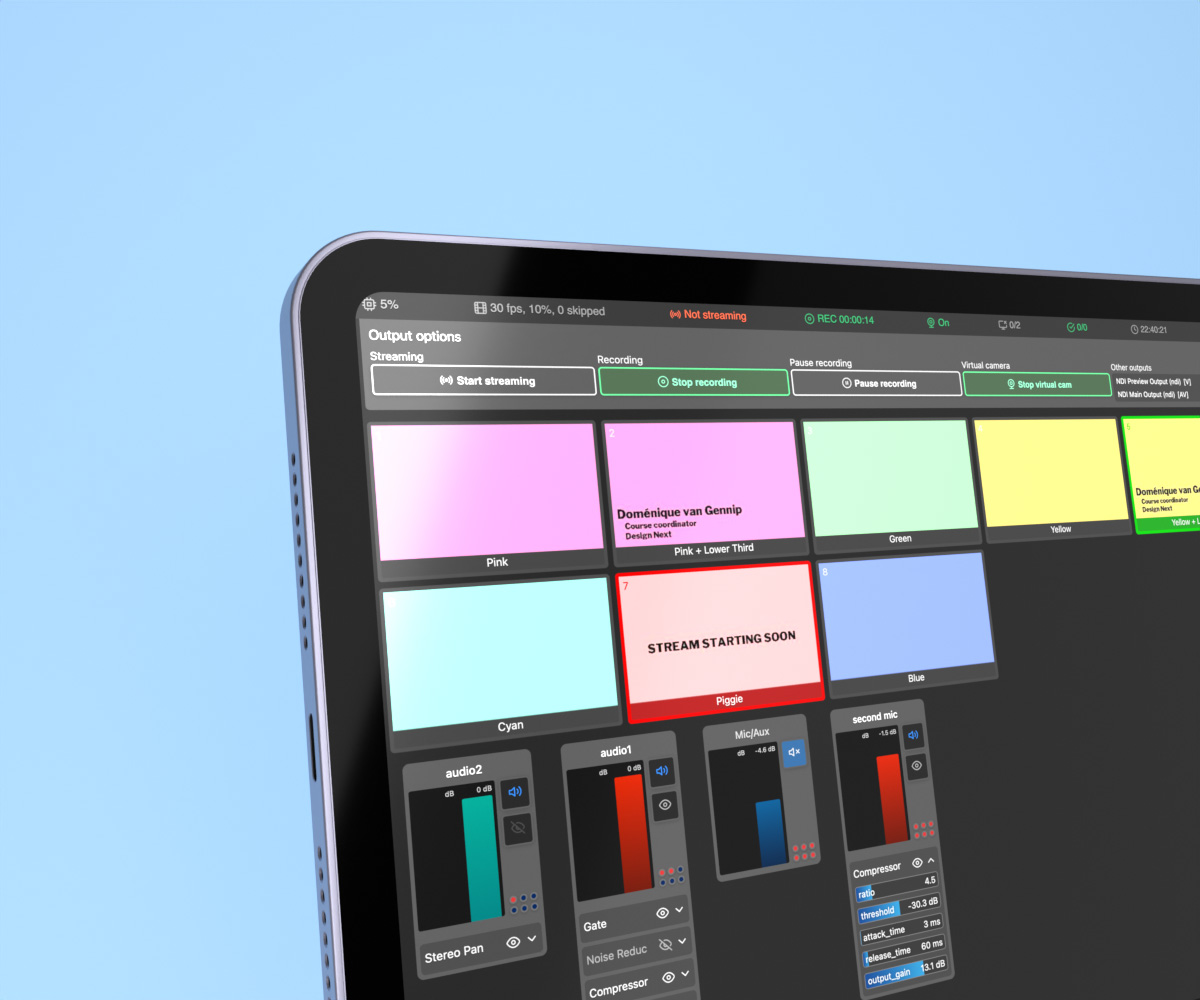
- Live scene previews for all scenes, not just the program output and preview scenes.
- Fine-grained audio control, including the ability to manipulate audio filters.
- Ability to edit on-screen text, with presets for multiple fields at once also possible.
The code is open source and available on GitHub, where I also keep track of ongoing issues and development. See there for further documentation in case you’re looking to use it.
Motivation and UI design: improving lecture livestreams
During the pandemic, we wanted to increase the production quality of our online lectures. With over 1200 students tuning in, giving those unable to attend in-person the feeling that they too are a part of the lecture was important. So we got into a lecture theatre, brought in a small audience, two cameras, a good microphone, some lights, and with all that, we got a better looking and more lively lecture livestream.
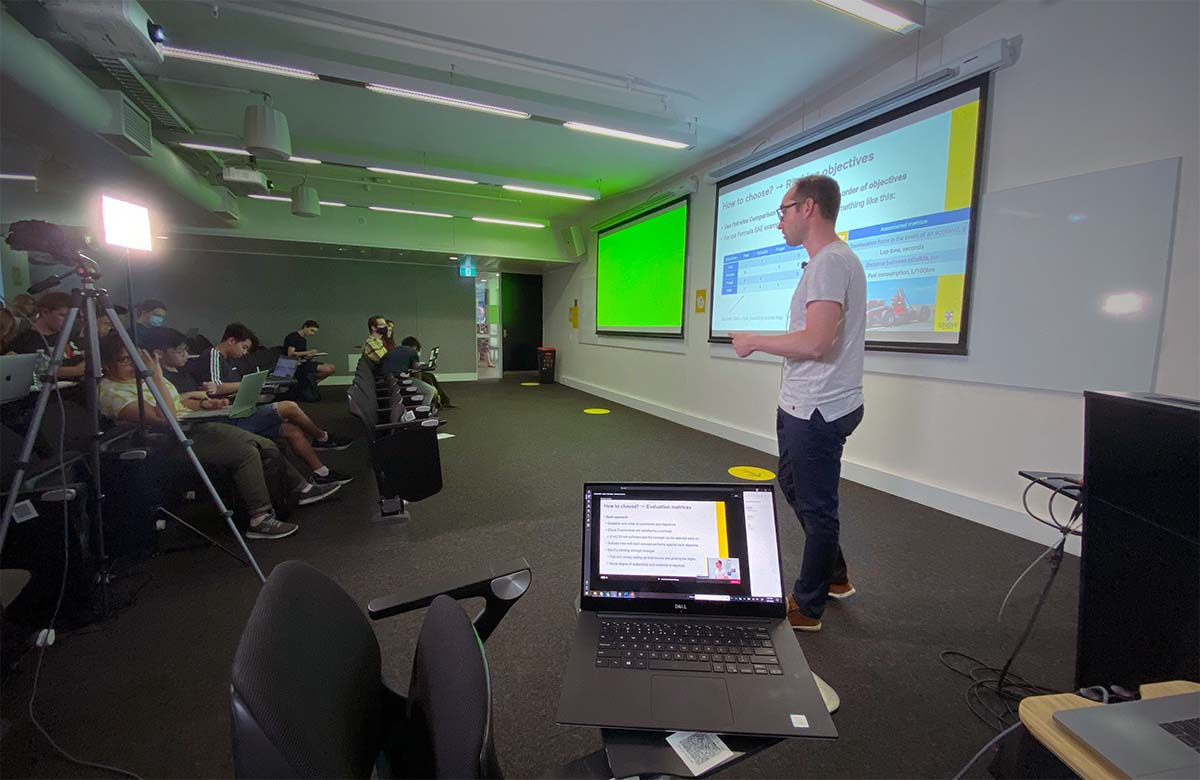
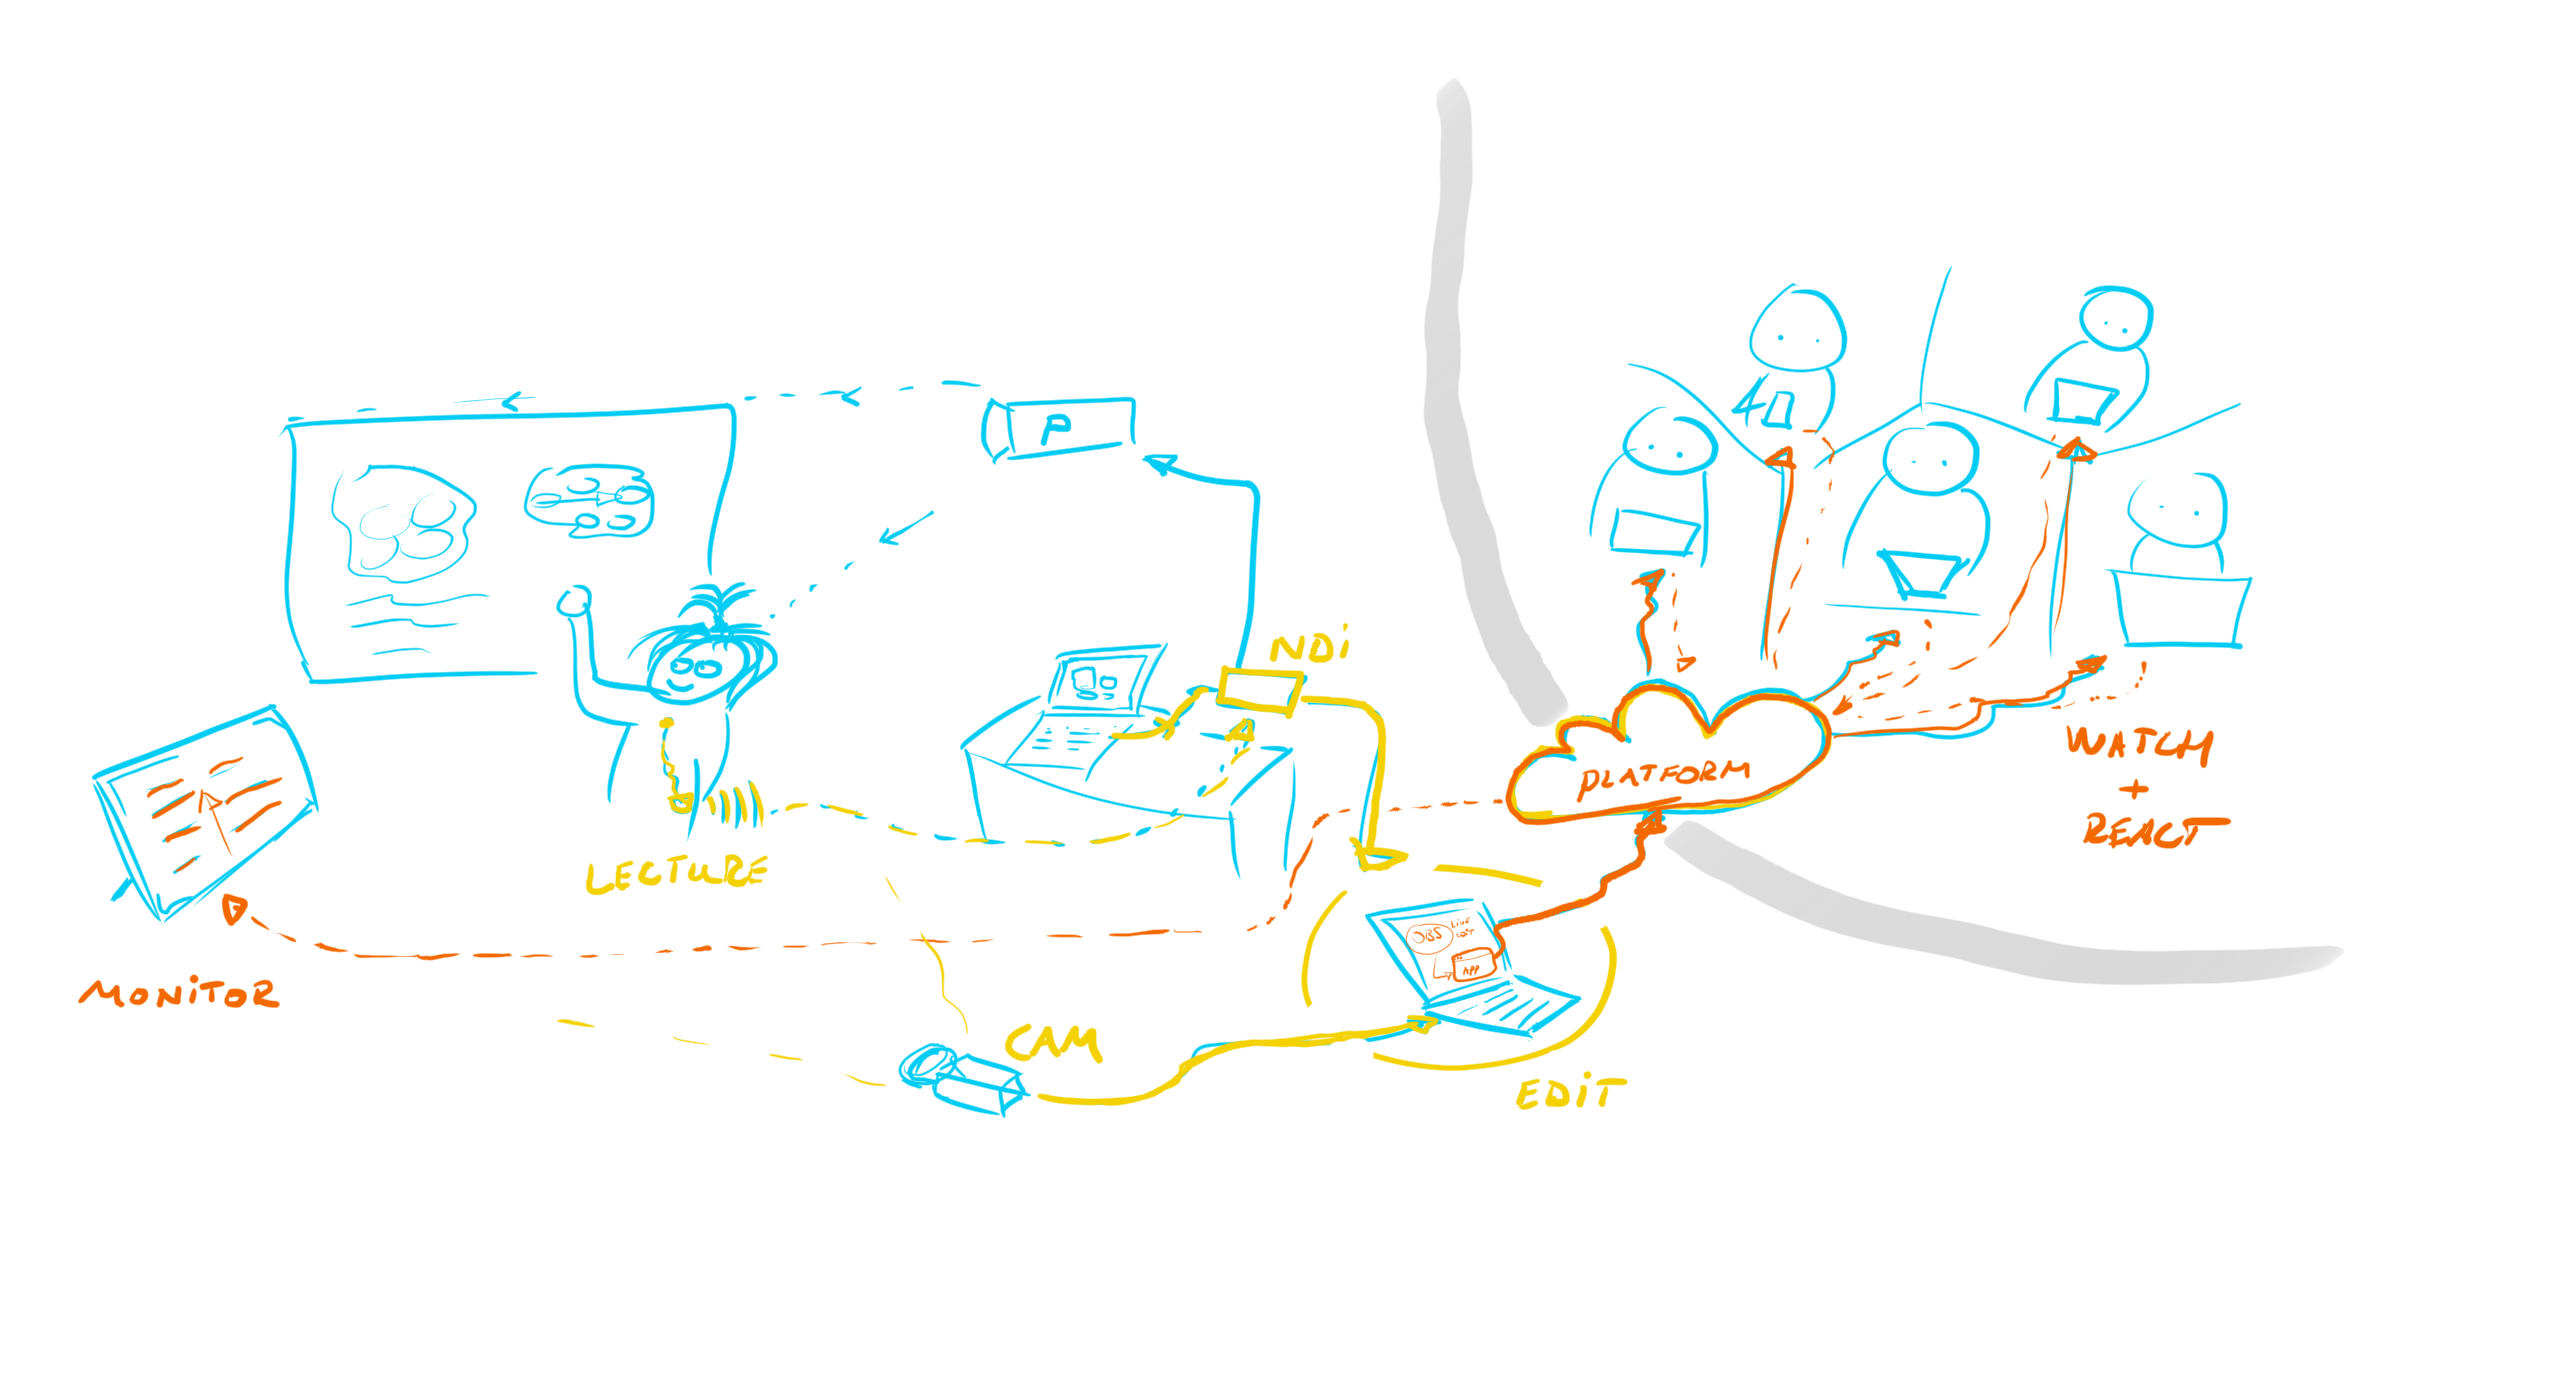
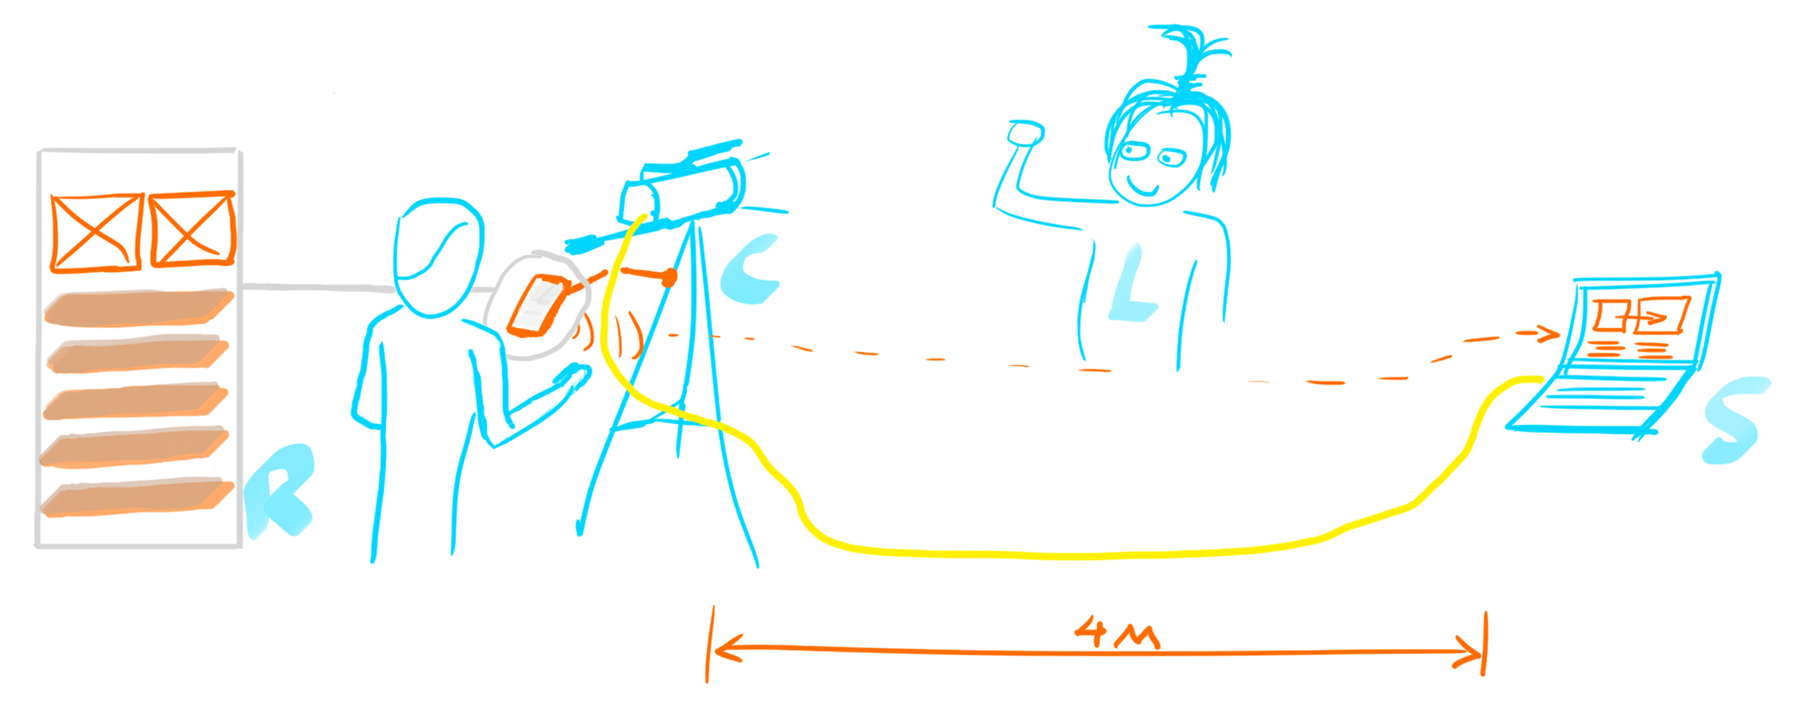
To run the livestream and switch between cameras, we used OBS Studio on a laptop. However, I also wanted to move the camera to track our lecturers. If only I could control OBS from an old phone so I didn’t have to be close to my laptop… No existing solutions worked on my 2011-model phone, so time to build my own! How hard can it be?
Version 1: dusting off an old phone
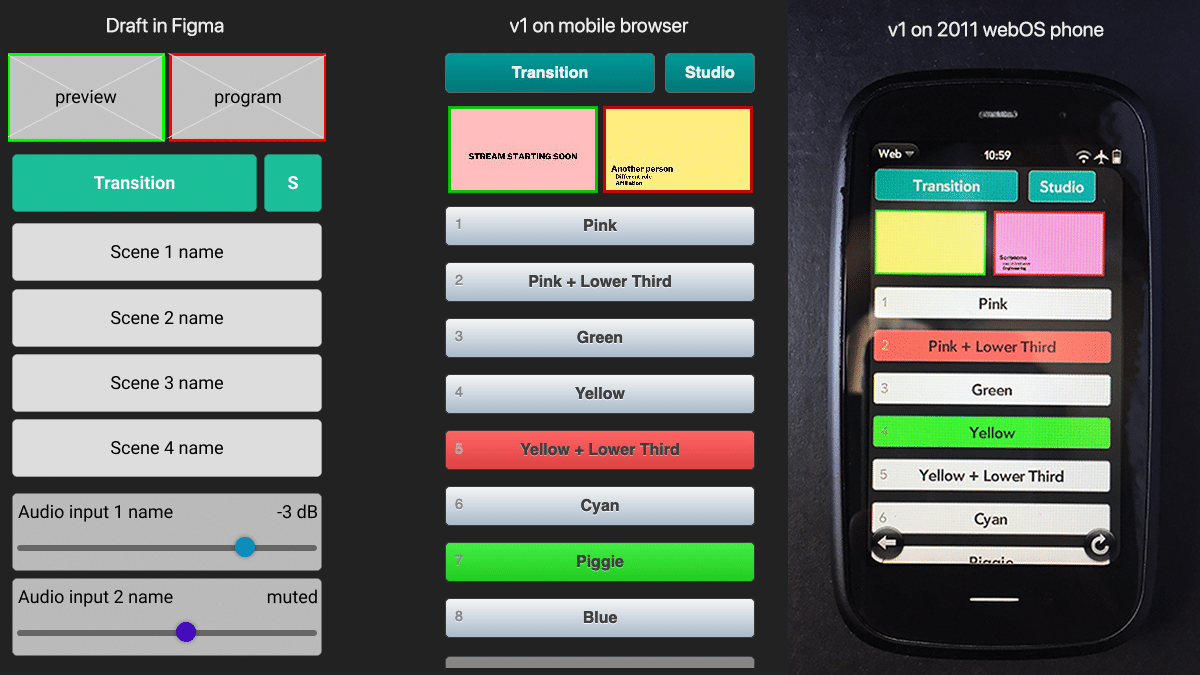
First, I built a simple remote control webpage that I could access via the phone’s browser. It was essentially just a list of scene buttons that I could choose between. Two previews were shown up top to give a sense of the scene that’s currently live (red border) and the scene lined up to come next (green border). While this version worked, making a modern system work with such an old device wasn’t worth further effort.
Version 2: let’s use a laptop instead
I refocused on controlling OBS from another laptop that I’d place close to the camera. That way, I could switch between visuals and adjust audio without leaving the camera. The biggest UI change was my focus on a laptop-sized screen. I ended up running this remote control page side-by-side with MS Teams into which we fed our livestream so I could keep an eye on the chat.
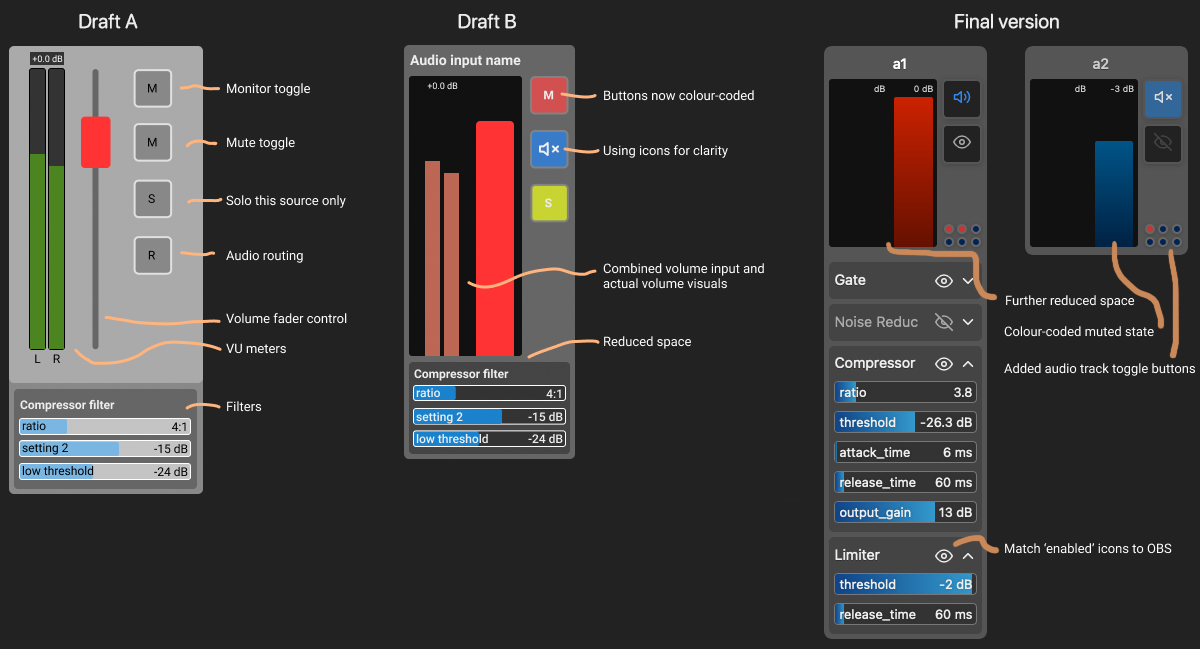
As I started to rely on this remote control, I added a status bar up top to see if things were running fine. Along the way, I made improvements as the need arose. For example, I extended the ability to control audio filters to better tune the sound in response to different speakers.
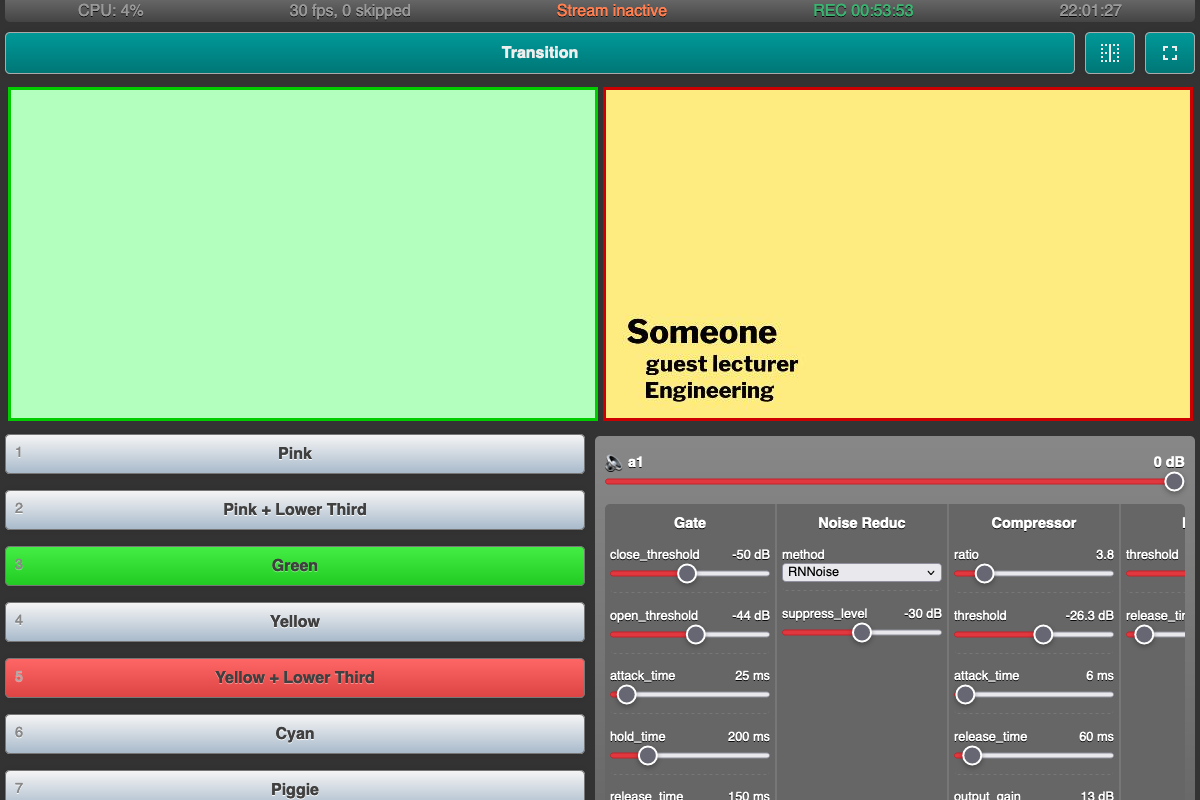
Version 3: revamped!
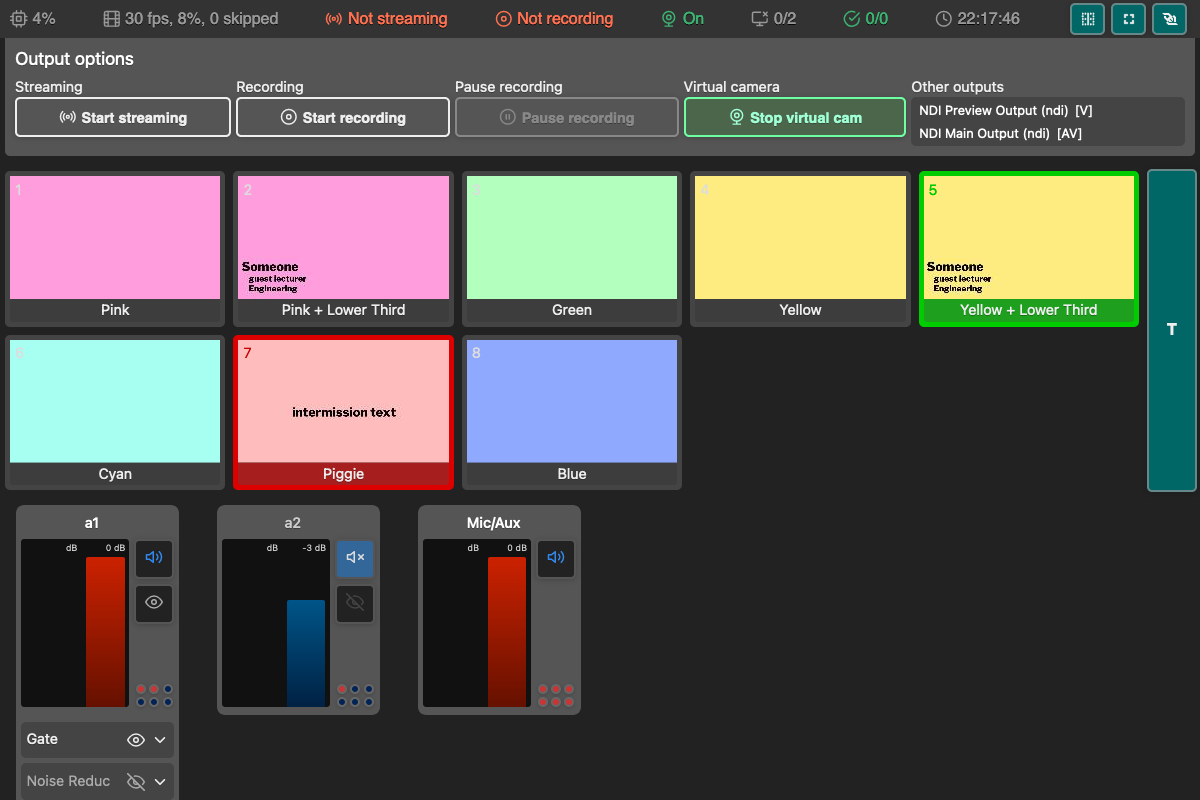
The third version came about as I learned what worked for me to produce the lecture livestreams. The most stressful time was right when the lecture started: I had to unmute the mics, check the audio levels, press record in two spots, switch between a few scenes as we got going, and keep the camera pointed at the now-moving lecturer, all while keeping an eye on the chat to see if people reported trouble with the livestream. So I needed more status info, the ability to press record right from the UI, and see live audio levels while adjusting things. Also, as I had the production machine still in sight, I didn’t need two big scene views up top: I could see them just fine a few meters away. Instead, I desired to see previews for all scenes so I wouldn’t have to rely on memory to know what I’ll switch to.
UI details
My experience led me to revamp the UI as shown above. Although I no longer focused on using this webpage on mobile devices, I made sure the overall layout still worked. One UI change that followed from mobile testing was to move the Transition button from a horizontal bar above the scene list to a vertical one alongside it. This means that when scrolling vertically along the scene list, the transition button is always there and within reach.
Technical changes
Version 3 also brought many changes under the hood. Since v1, I had been using simpleobsws as it acted as a webserver for pages I could then access via a phone browser. This made it all work on my old phone. But connecting to OBS directly from the webpage via obs-websocket-js enabled me to act on changes in OBS with little delay, rather than refreshing data only every few seconds. It’s what made it feasible to have previews for every scene and adjust audio with very little delay so I could hear the difference and adjust. Making that change also simplified the setup as now there’d be only two parts to worry about.
Reflection
It was interesting to design and build something where I was the primary user. It highlighted the fact that some requirements and ideal configurations only became apparent as I used the system for a bit and then reassessed. Making changes as I went improved things but even with a relatively simply system, I already incurred both technical and design debt. To resolve that, I’d need a version 4…