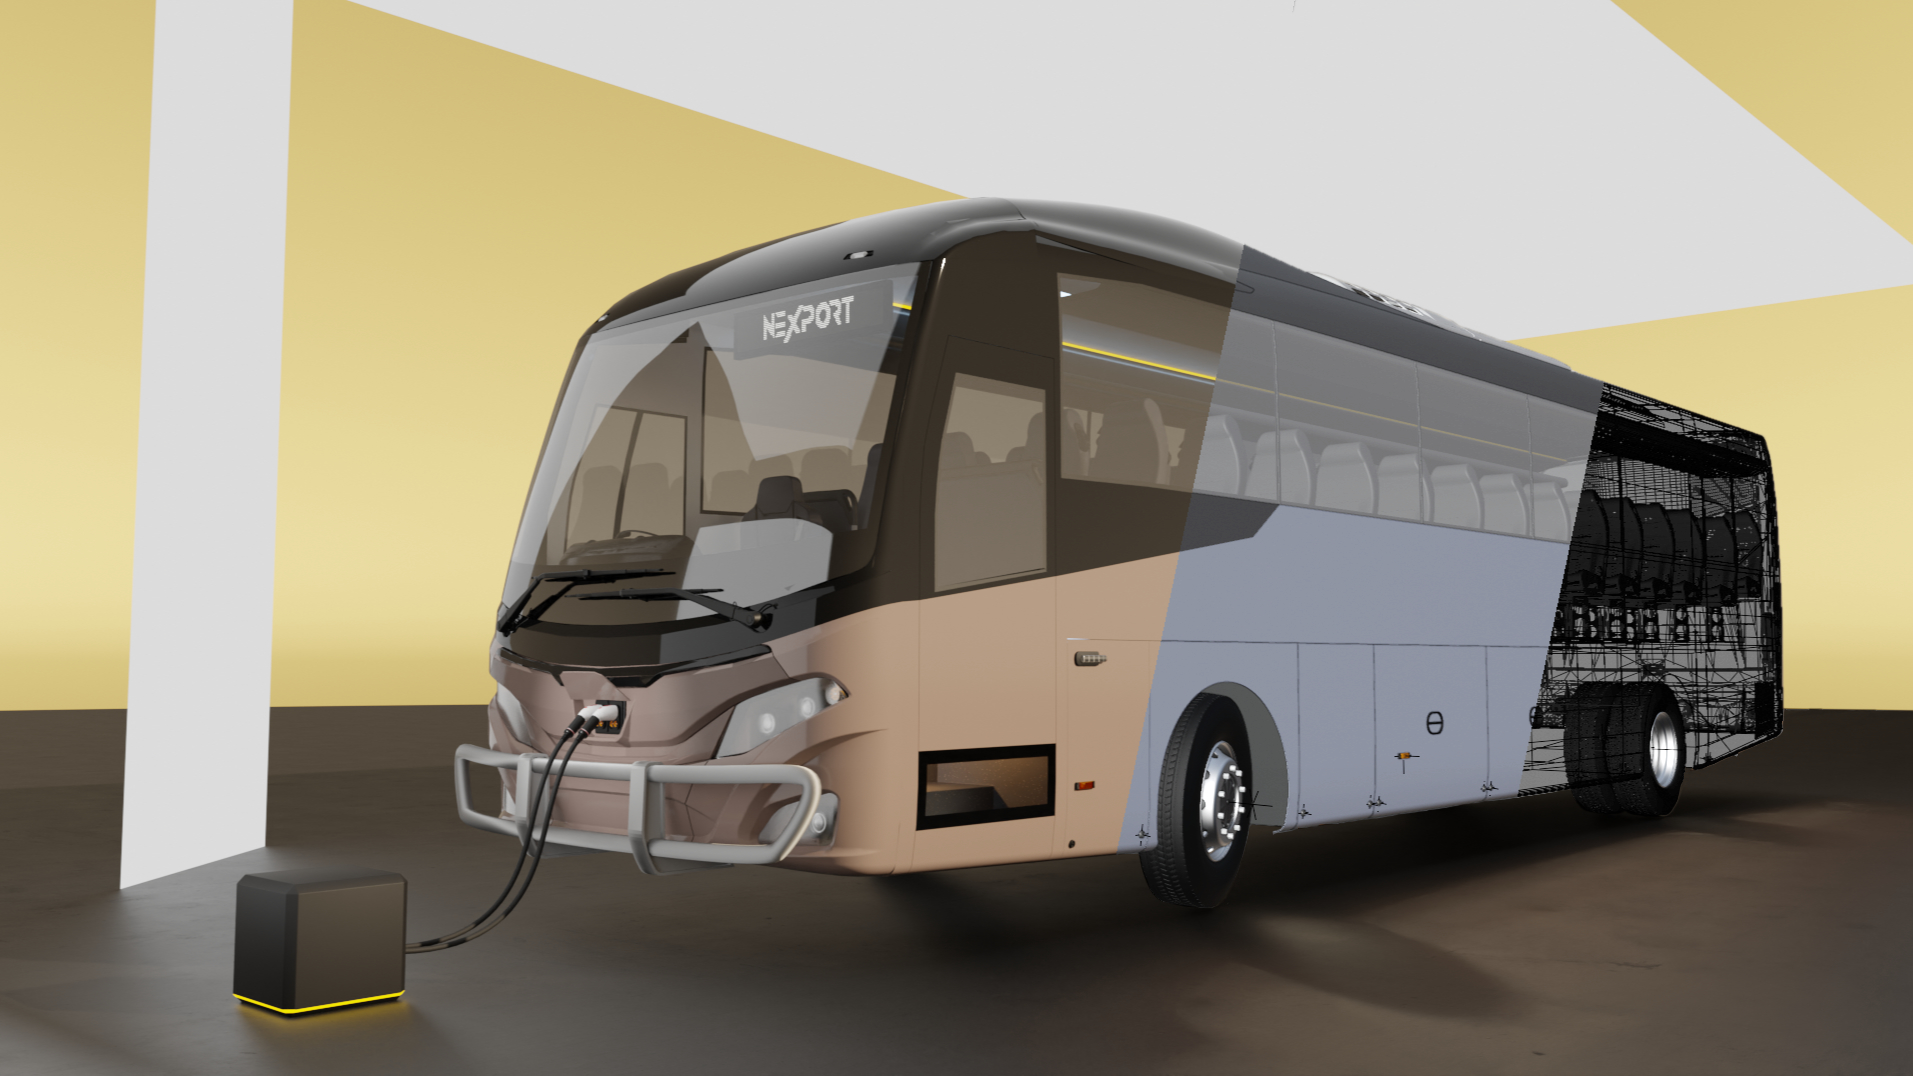
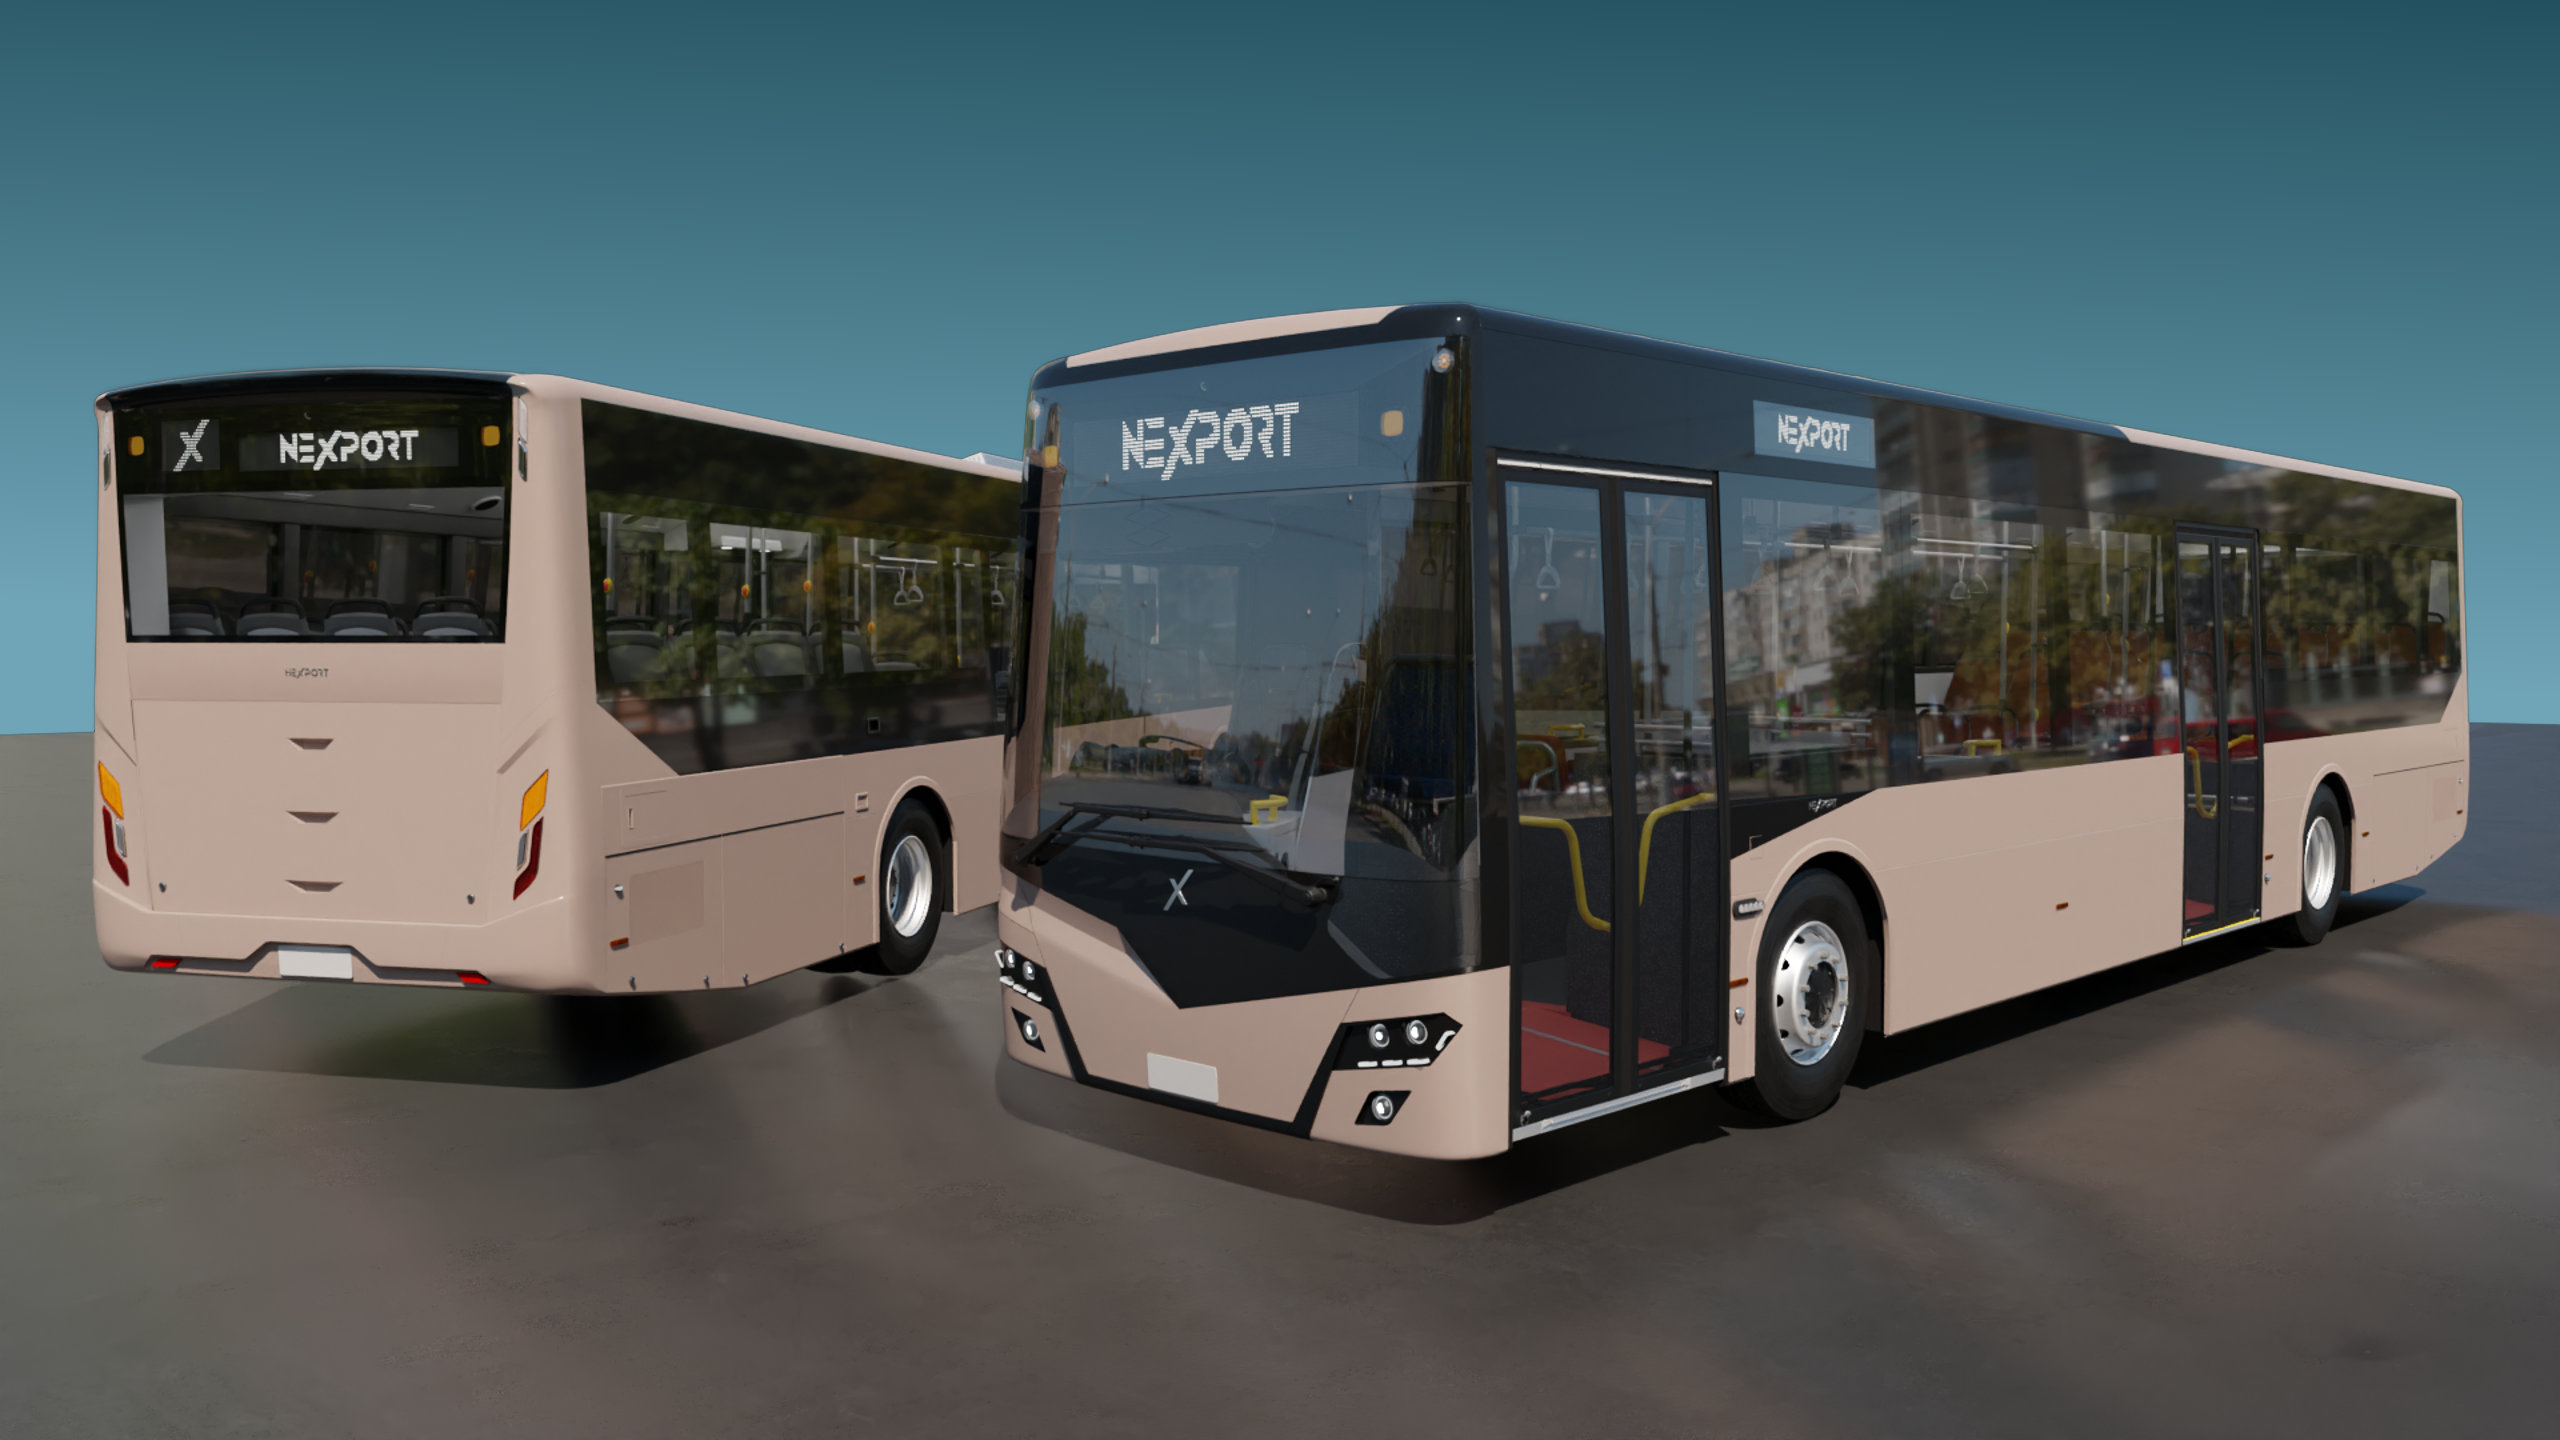
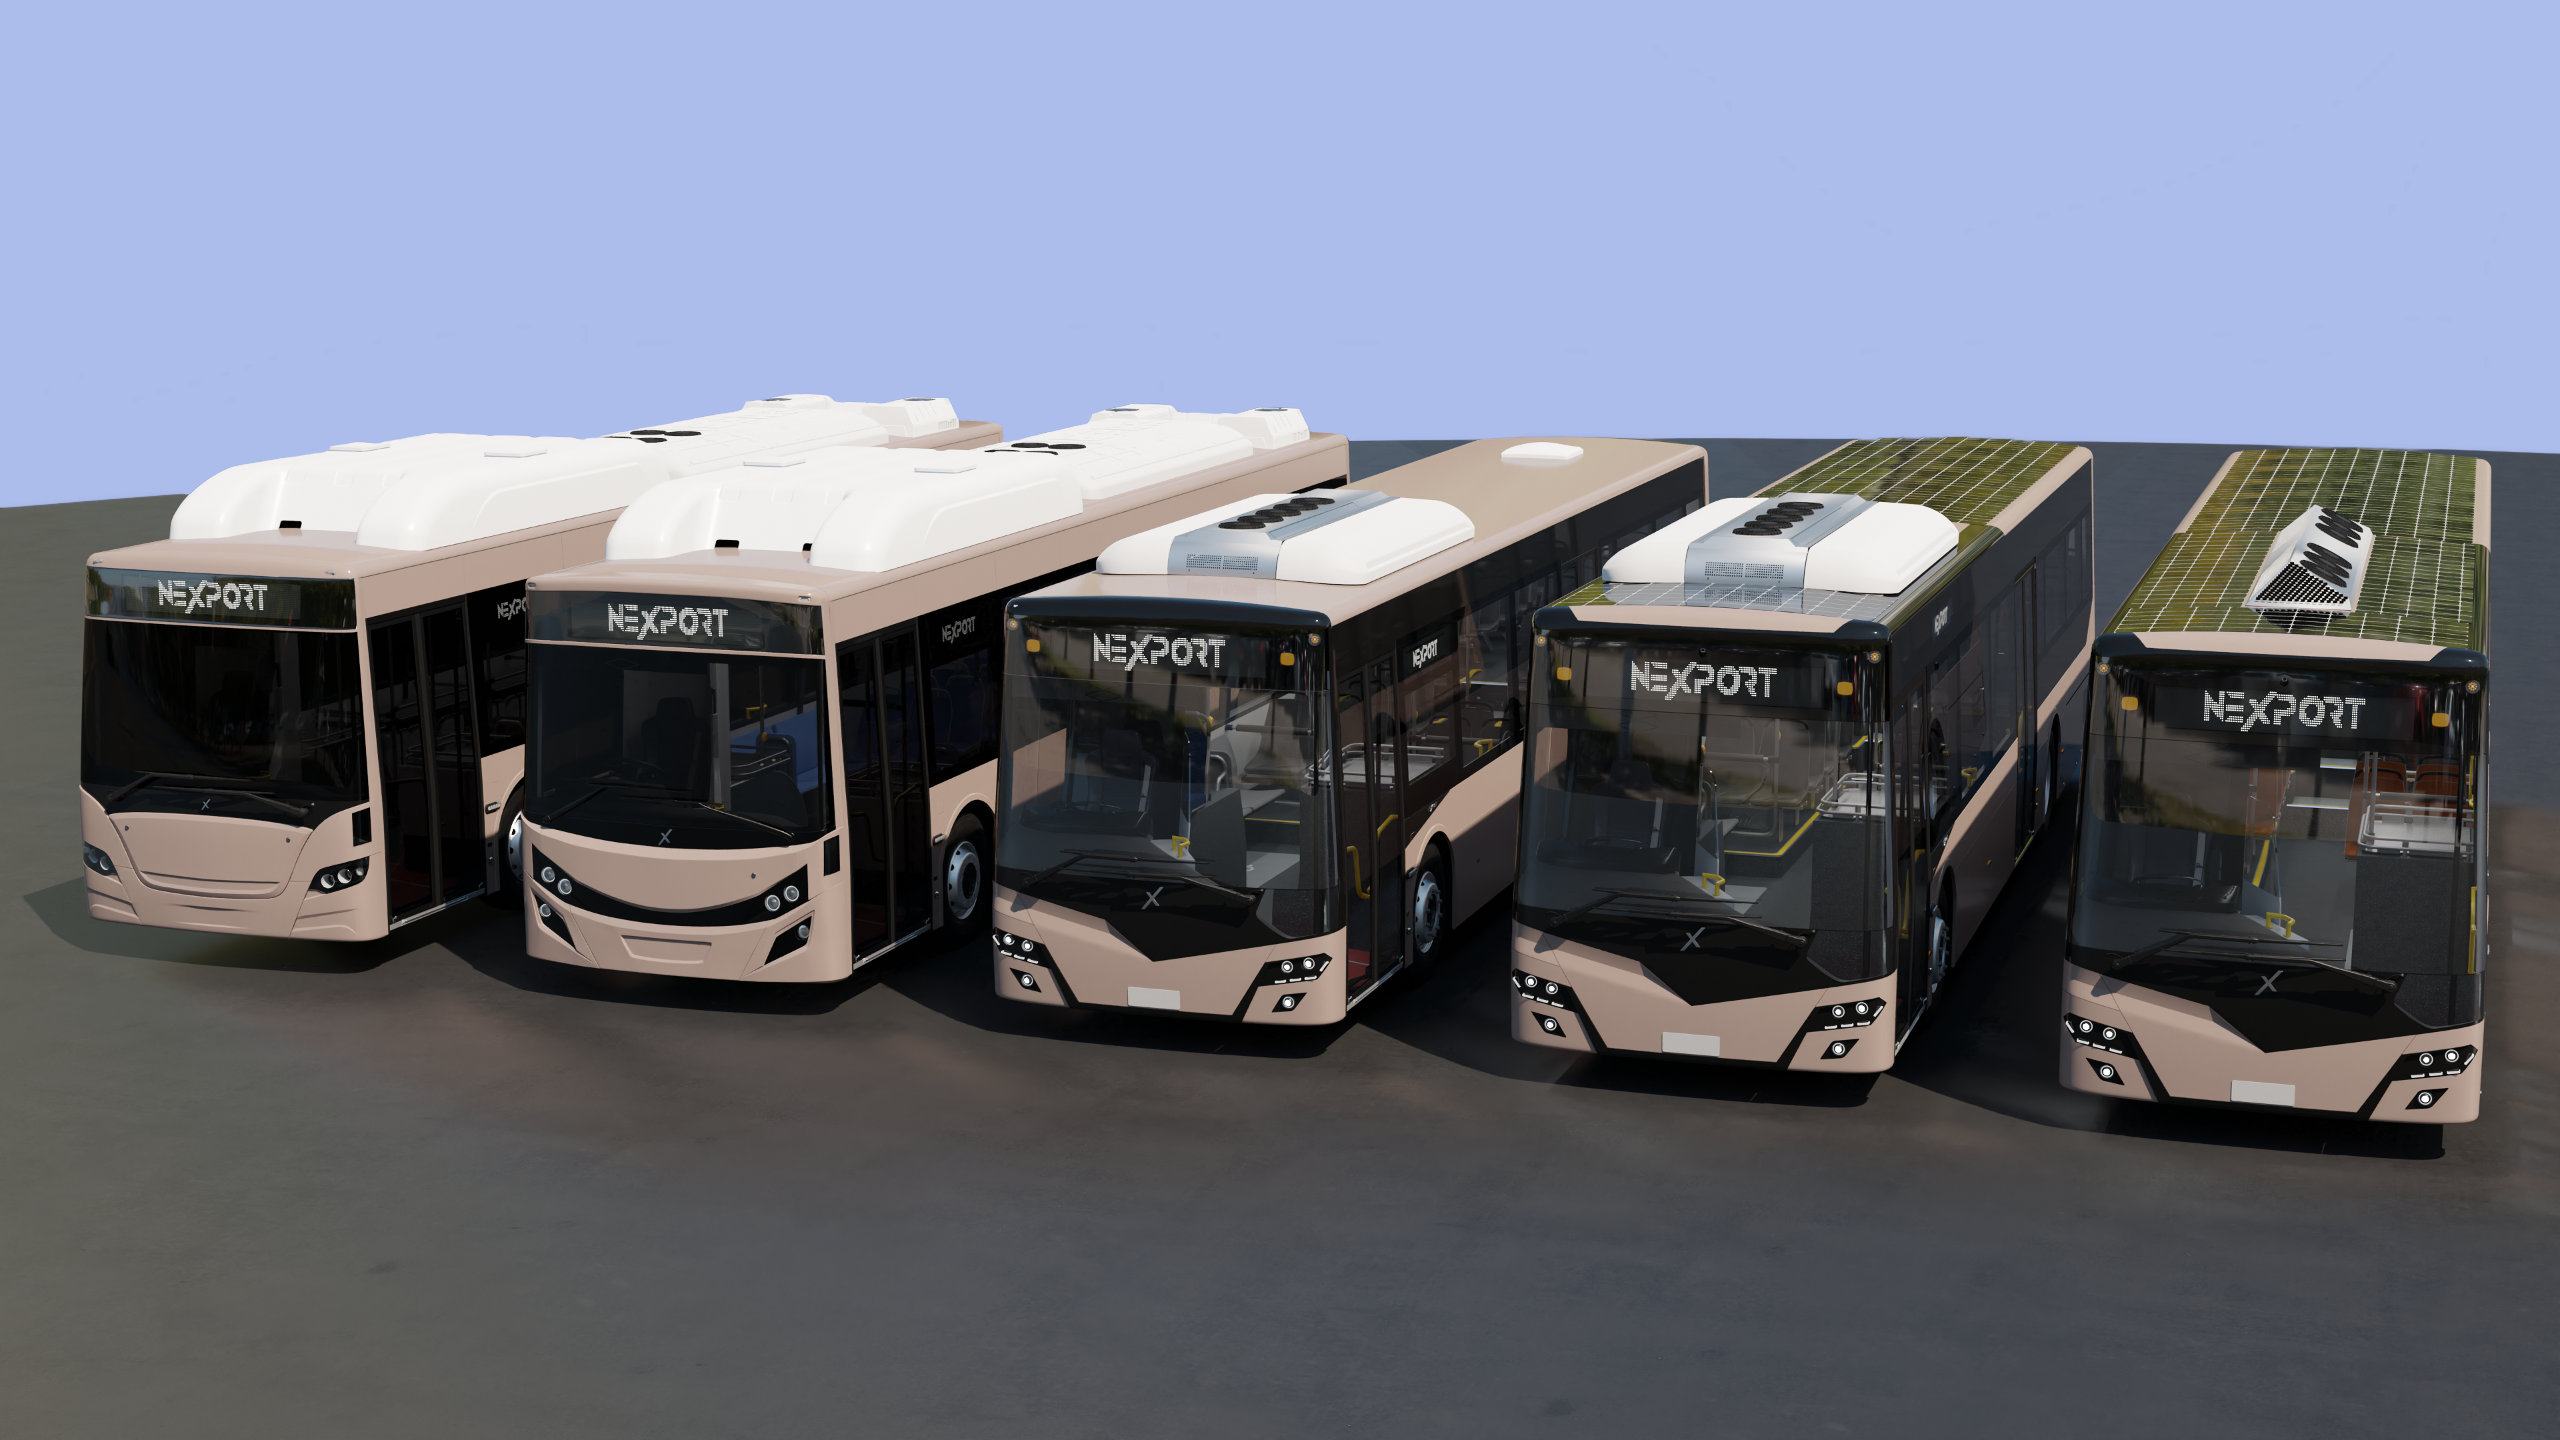
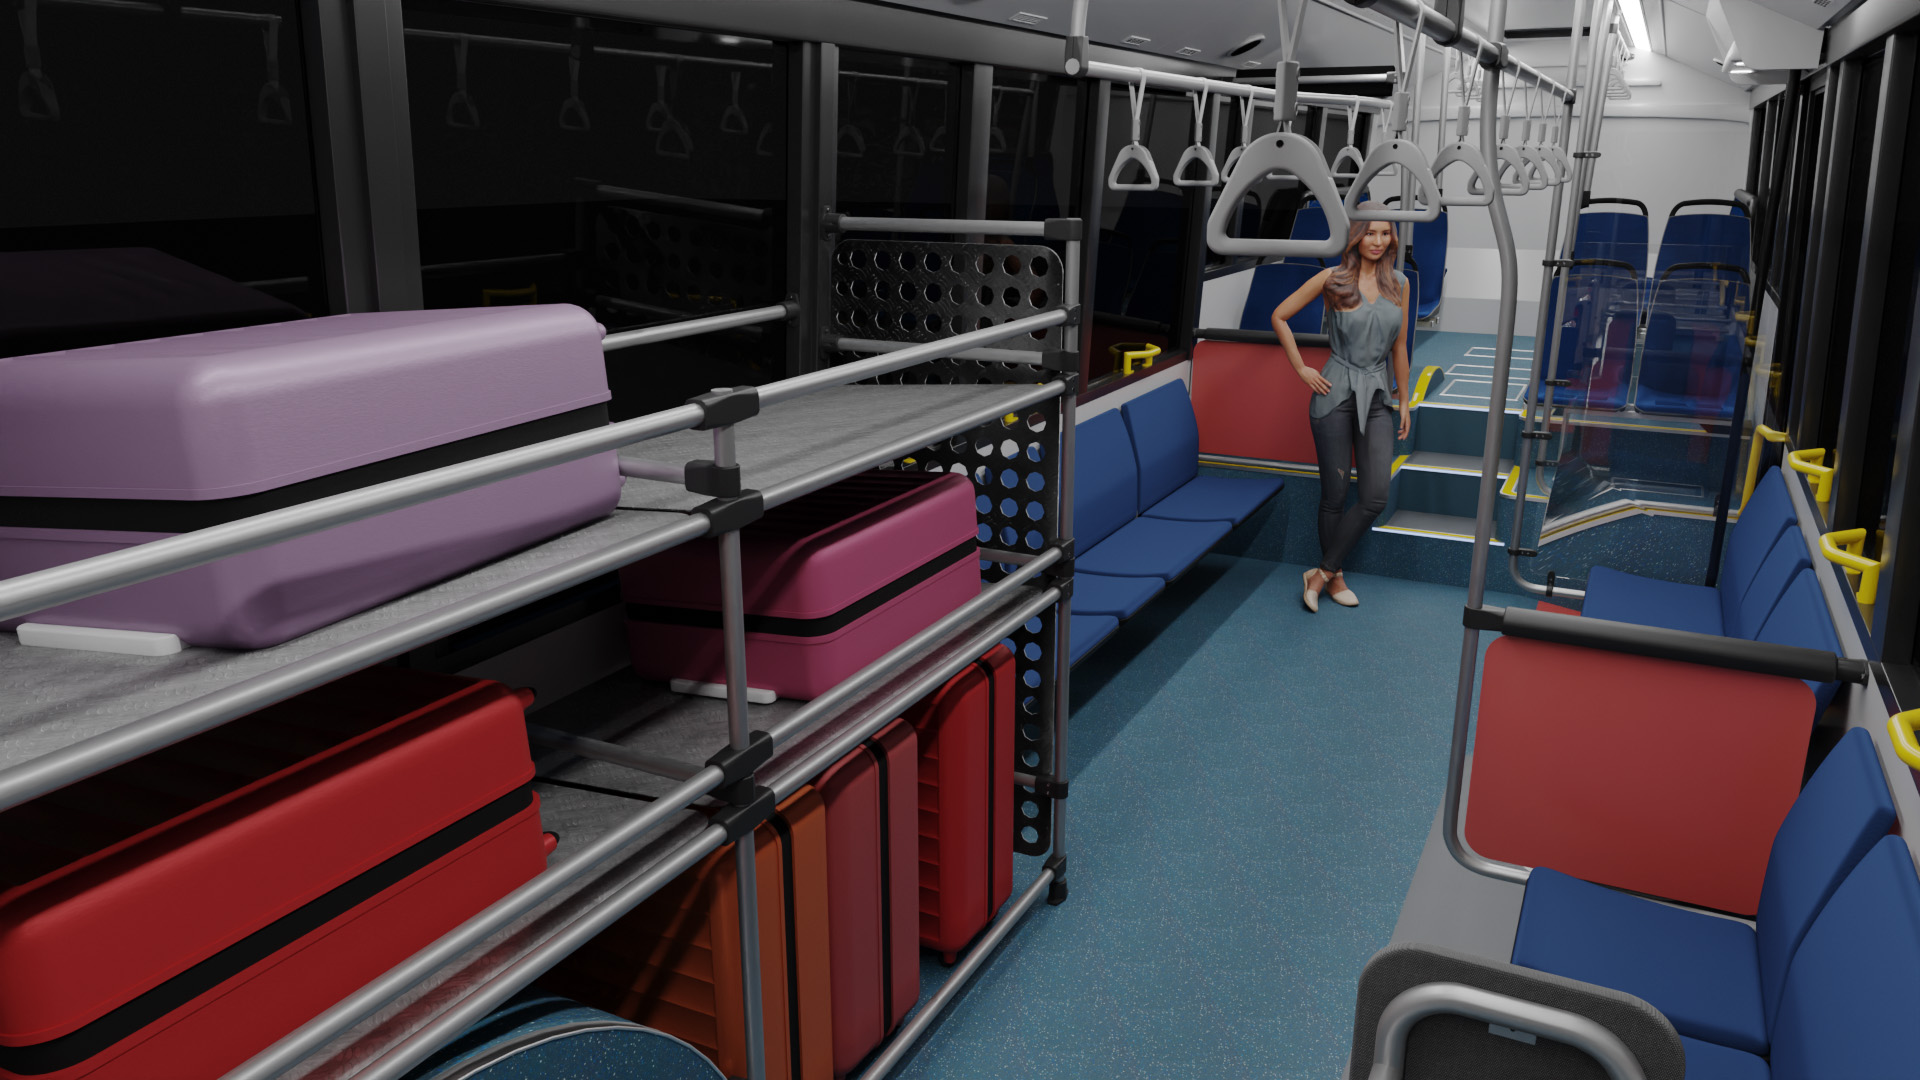
3D bus product renders

Visualising a product portfolio

When

2023

Client

Nexport

Team

My role

I produced 3D renders of Nexport’s product portfolio to support the nascent sales and marketing team. These renders were used in a range of communications, including LinkedIn, brochures, investor presentations, and on exhibition collateral. Internally, I used these renders to illustrate new design directions.

Process

I modelled most critical parts from scratch, using technical drawings and actual buses in our workshop for reference. Where possible, I imported 3D CAD models but these proved often both too detailed and yet of poor visual quality. For the first bus I covered, I spent approximately three weeks to complete the renders. Of that time, two weeks were spent modelling with the first week dedicated to obtaining measurements, references, etc.
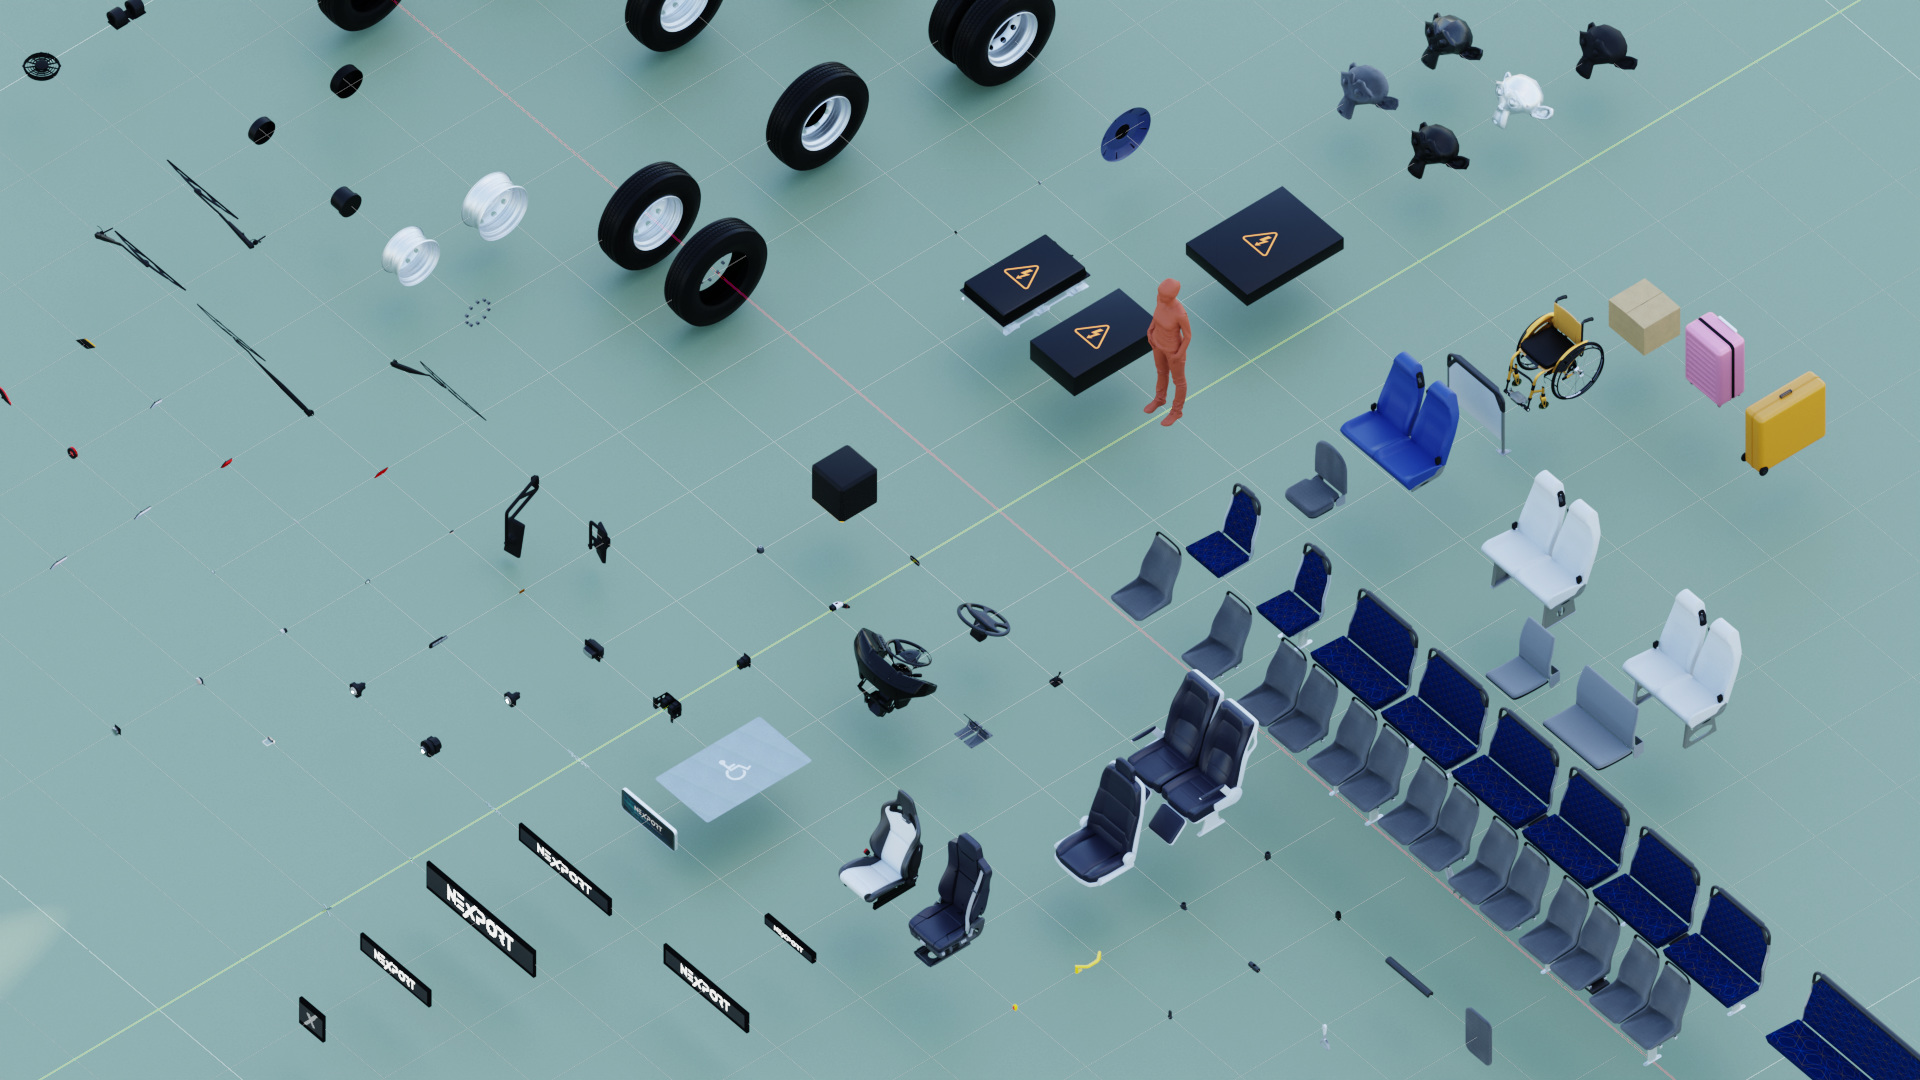
front three quarter view of a 12m low floor city bus on a red background
First model that I completed, a Gemilang-BYD bus. At the time, this was our flagship model and the most common electric bus in Australia. Shown here in a stylised shot.

Interior 3D render of the bus shown above. It features luggage racks and sideways mounted seats
All passengers vehicle models received a complete interior. This allowed me to vary seat colours, floor vinyl textures, and other features to match customer requirements. This instance shows an airport shuttle variant.

Asset library

All modelling was done in Blender, while making extensive use of an ever-growing library of 3D models and materials. For example, wheels and tires are reused between vehicles. Using a parts system like this made it easy to build new variations or even draft vehicles from scratch. Reusing models also helps to reduce complexity and pressure on computer hardware.

Lined up in a grid, 3D models are shown across the image
Partial view of the assets library. Using a library of reusable design assets, I sped up the production of 3D models significantly. Some models were based on supplied CAD files, but most were made from scratch.

Managing others

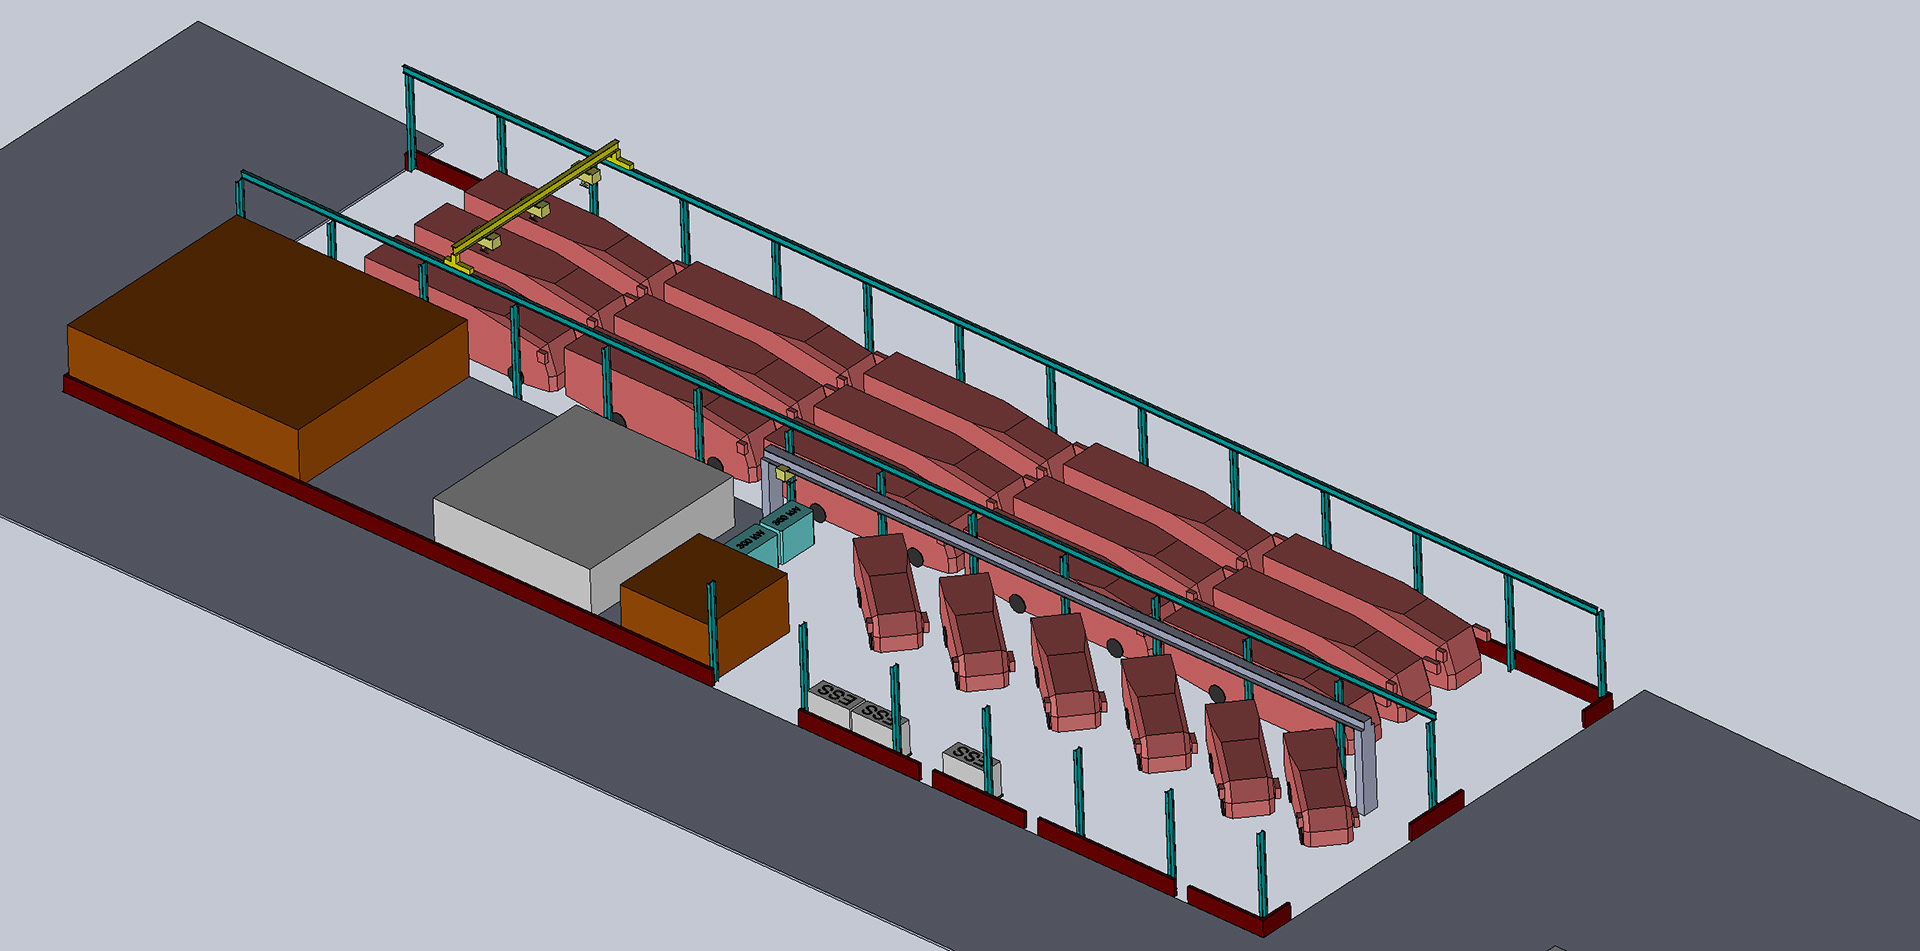
Occassionally, I managed contracted 3D modellers to deliver assets to enable faster or concurrent deliveries. One example involved a technical study for an electric concrete mixer truck. Challenging due to high expectations on practical loads, Nexport sought further investment to develop this vehicle for the Australian market. Using technical info provided to me, including a rough layout of major components, I made some quick sketches to get the major shape down. There was no time for detailed design, so while a contractor began his work on a model, I made a very simple 3D model to communicate the key dimensions and shapes. Combined with geometric data from the OEM cab and chassis supplier, this allowed the contractor to progress. Every few days, I received visual updates which I annotated to guide the contractor towards the final result. My responsibility was to ensure both visual quality and timely delivery to allow the CTO and commercial team to continue their negotiations.

Sketches, technical drawings, and annotated renders in a collage
Concepting process of a concrete mixer truck. My contribution mixed both technical evaluation of the proposal and design management of the creation of the 3D models and rendered visuals.

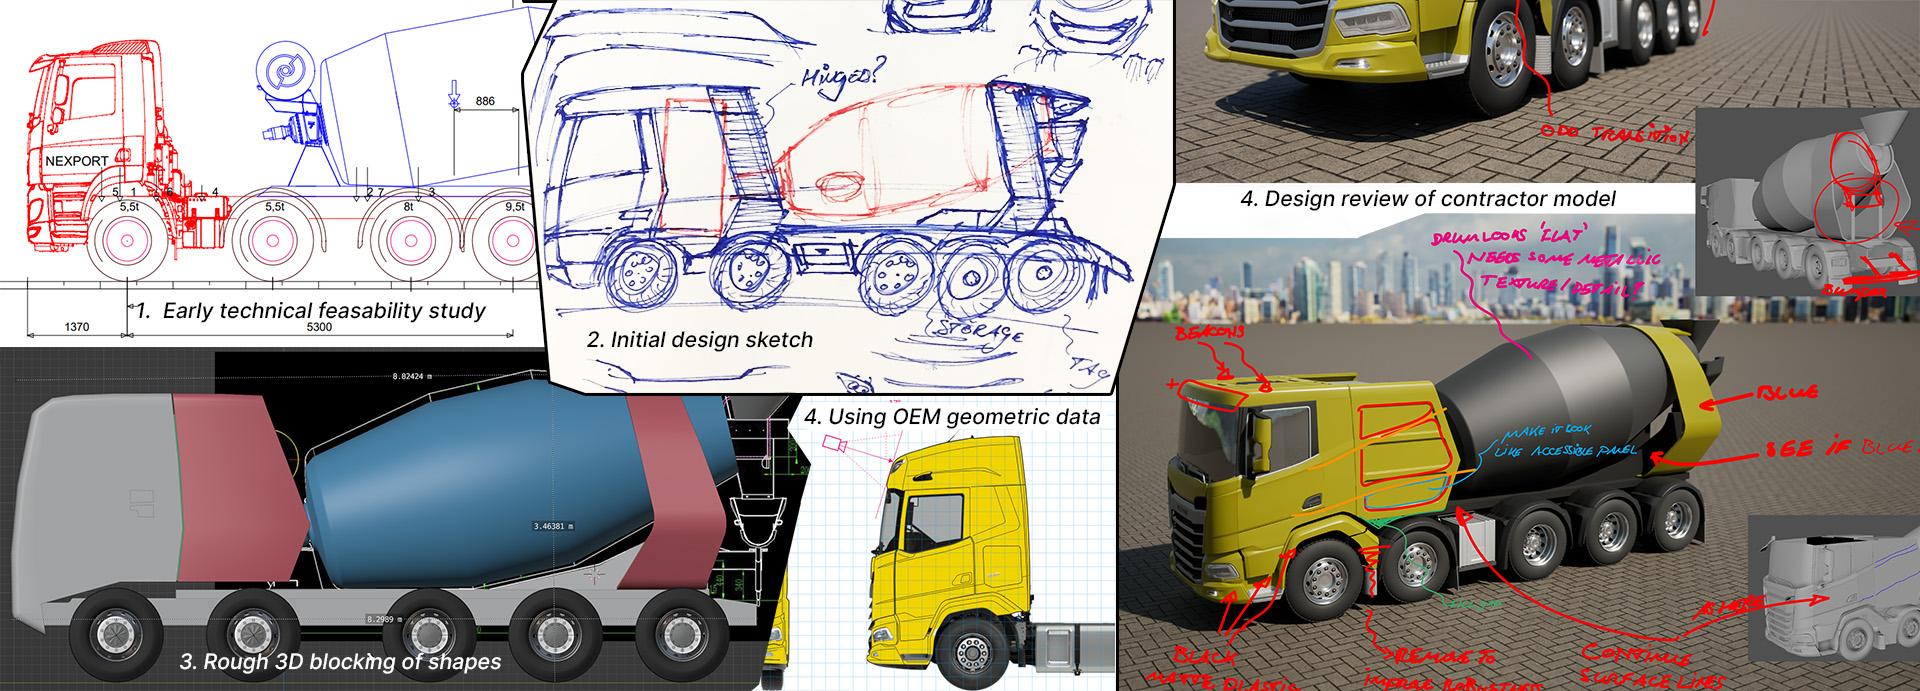
Long after the contractor completed his work, I used the provided models to generate variations as the technical discussions progressed. Axle layouts, battery size and their locations would vary, necessitating model changes. I used Blender as a fast concepting tool, allowing me to iterate quickly (compared to more rigid tools like SolidWorks). Given the primary use of these renders as discussion tools, we did not devote time to staging models in typical use environments, so the render below is an exception to the norm.

3D render of a concrete mixer truck moving towards two people and a crane in the distance. Some dust seems to float in the air.
Mixer truck placed in a fictional environment, using my evolution of a contractor's model. The environment pieces were mostly kitbashed and put together by me, and that also applies to all rendering and post-processing.

More examples

front three quarter rendered view of a 12m coach on a yellow background, with more basic render styles visible towards the right
Render of a 12m coach, made to support discussions around alternative charging port locations near the front of the vehicle. The original detail shot did not require a complete model so this one is only partially complete.

Exterior 3D render of another 12m bus, with another uit shown to the left with its rear visible to the viewer
Concept iteration for a revised front and rear canopy. The lowered windscreen would enable greater visibility for the driver, with its assymetric appearance also lending the vehicle a distinct character.

Row of five buses next to each other, showing a design evolution from left to right
Five design generations. With the outgoing model on the far left (also shown earlier in blue/red, its replacement next to it, the three designs shown toward the right represent a vision for the near-future.

Isometric render of a bus depot with simplified shapes to represent buses and other critical components
Basic bus depot model made in SolidWorks to support commercial discussions for an electrification project. Following on-site measurements, using these basic models, I could experiment with a layout that would let us fit in and move around a given number of buses, with each in range of overhead charging infrastructure. This model was kept very simple to allow for fast iteration of layout, equipment, and number of vehicles.